.svg)


You have imagined a shape that would fit perfectly into your presentation but do not know how to reproduce it on PowerPoint? Do you want to change a shape but don't know how to do it or even if it's possible with PowerPoint? You have tried everything, you cannot find the solution. Don't panic, we'll explain to you right away how to do all that.
We will guide you step by step to perform these operations and obtain the expected result. First of all, know that there are several ways to achieve your goals. It is possible to create a shape from a “free form”, or by working with two shapes to form only one in the end.
1. Freeform on Powerpoint
Under this pretty, liberty-loving name, hides a very effective tool that allows you to let your imagination run wild and draw the most complex shapes and designs.
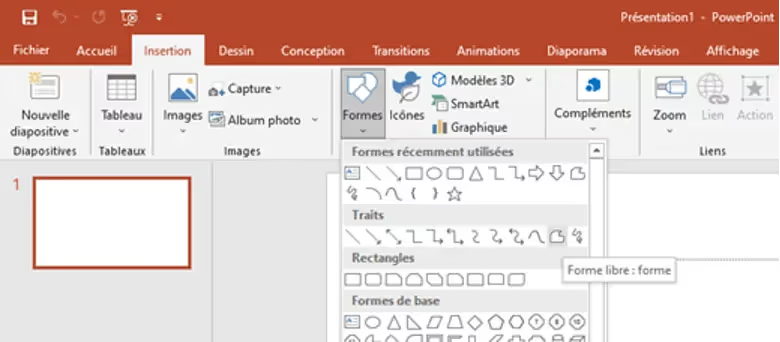
In the “insert” tab on Powerpoint, select “Shapes”, then in “Lines”, select “free form”.
Once the shape is selected you will be able to draw your path. Each click will define a point in the shape and allow you to create a geometric shape. Then, if you hold the mouse, you can do a freer, drawing-like plot, with no lines between the points.
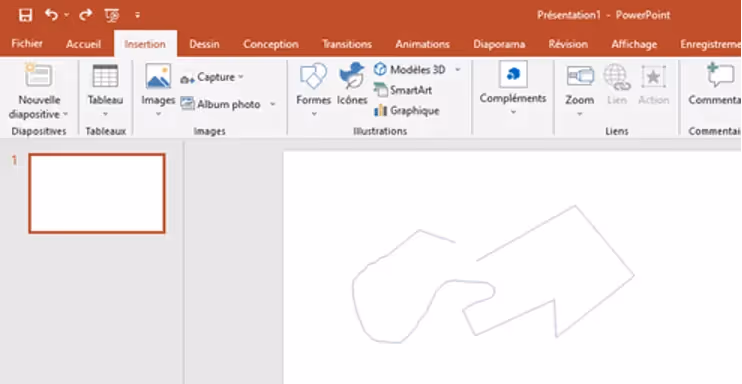
Once your creation is complete, you will need to finish the shape. Powerpoint gives you two options, either go back to the first point so that it closes automatically, or use the “enter” key on your keyboard to finish the shape where you want. However, it will remain open and it will not be possible to fill it with textures or colors as you wish.
2. Work with shapes defined on Powerpoint
You will now explore the shapes defined by Powerpoint, these can be found in the “Drawing” tab. This function allows you to create the simplest shapes but also to modify them to obtain a tailor-made shape by going to the “Formatting” category.
Merge shapes
The “Merge Shapes” function allows you to customize the shapes.
There are five different fusion options:
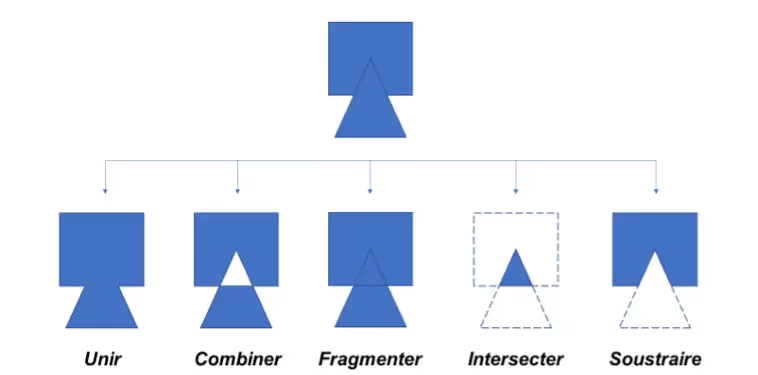
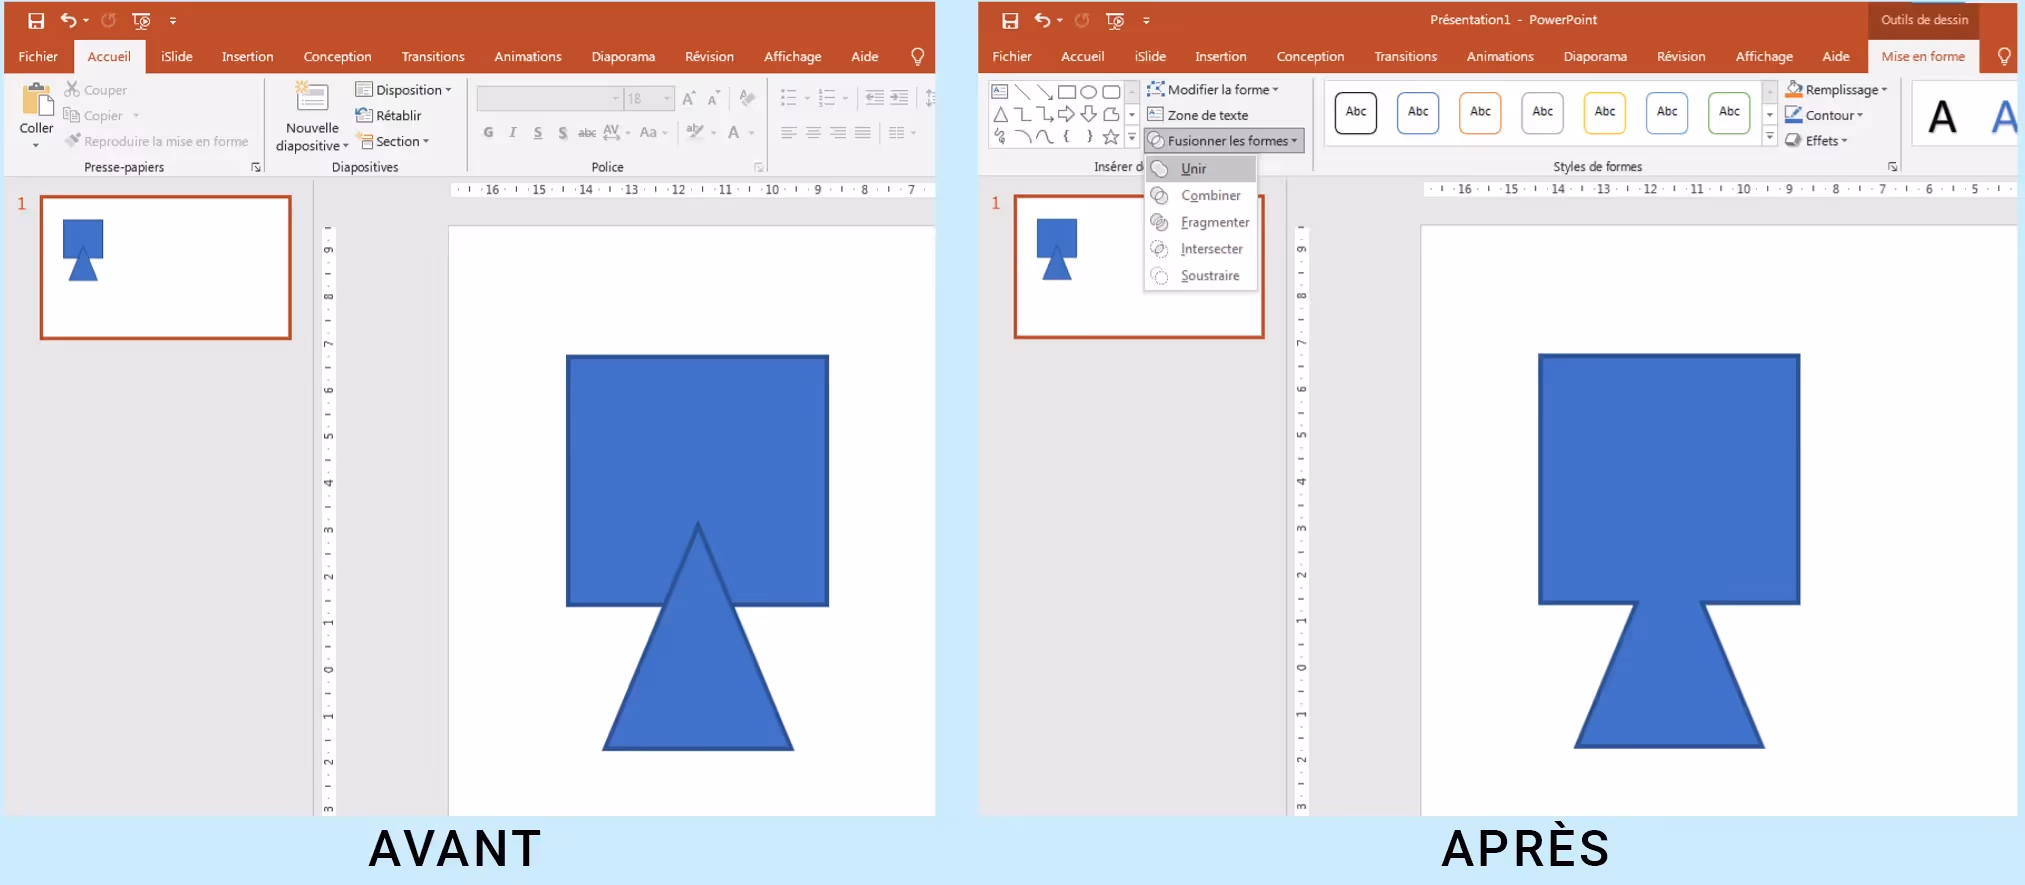
Unite
Used to get a single shape from multiple shapes.
Starting from two different or identical shapes, start by superimposing one on top of the other. Select your two shapes, then go to the “Formatting” category, and in the “Merge Shapes” function select the “Unite” option.
Your two shapes have now merged into one.
Note: The result maintains the formatting of the first selected shape.
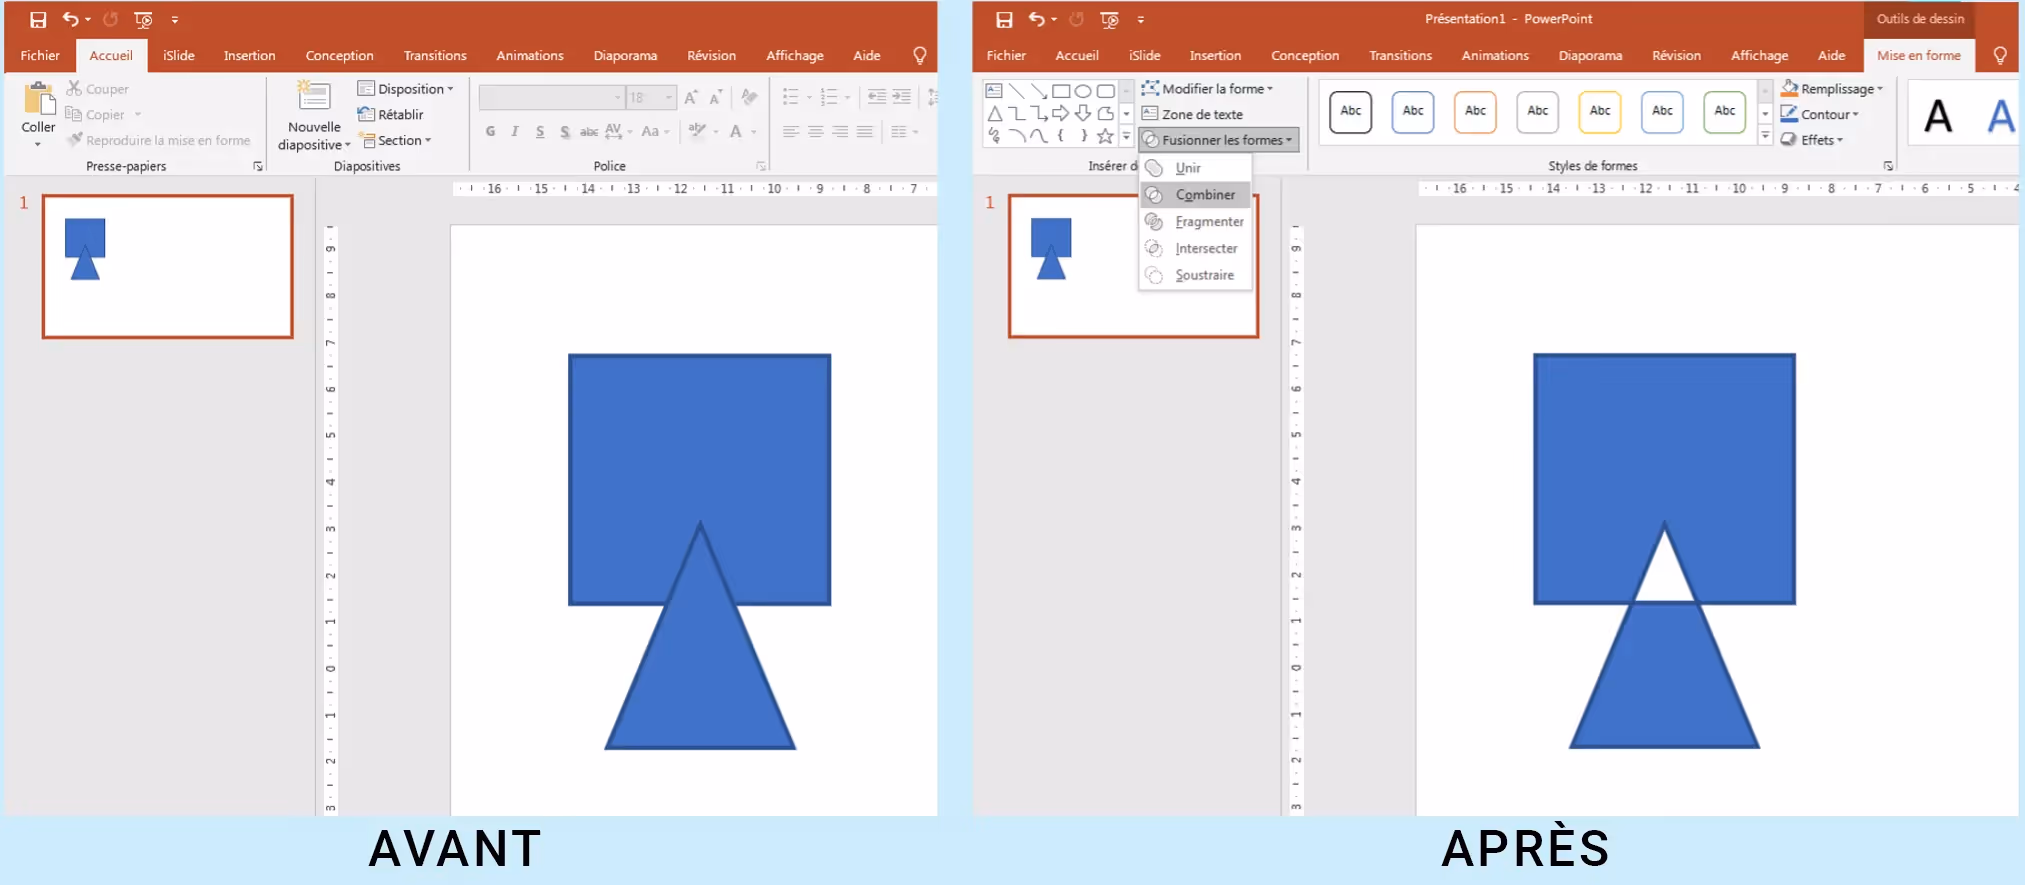
Combine
Used to subtract areas of shapes that overlap and combine areas of shapes that do not overlap.
Starting from two different or identical shapes, start by superimposing one on top of the other. Select your two shapes, then go to the “Formatting” category, and in the “Merge Shapes” function select the “Combine” option.
The area where the two shapes overlay has been subtracted and the rest of the shapes have been combined.
Note: The result maintains the formatting of the first selected shape.
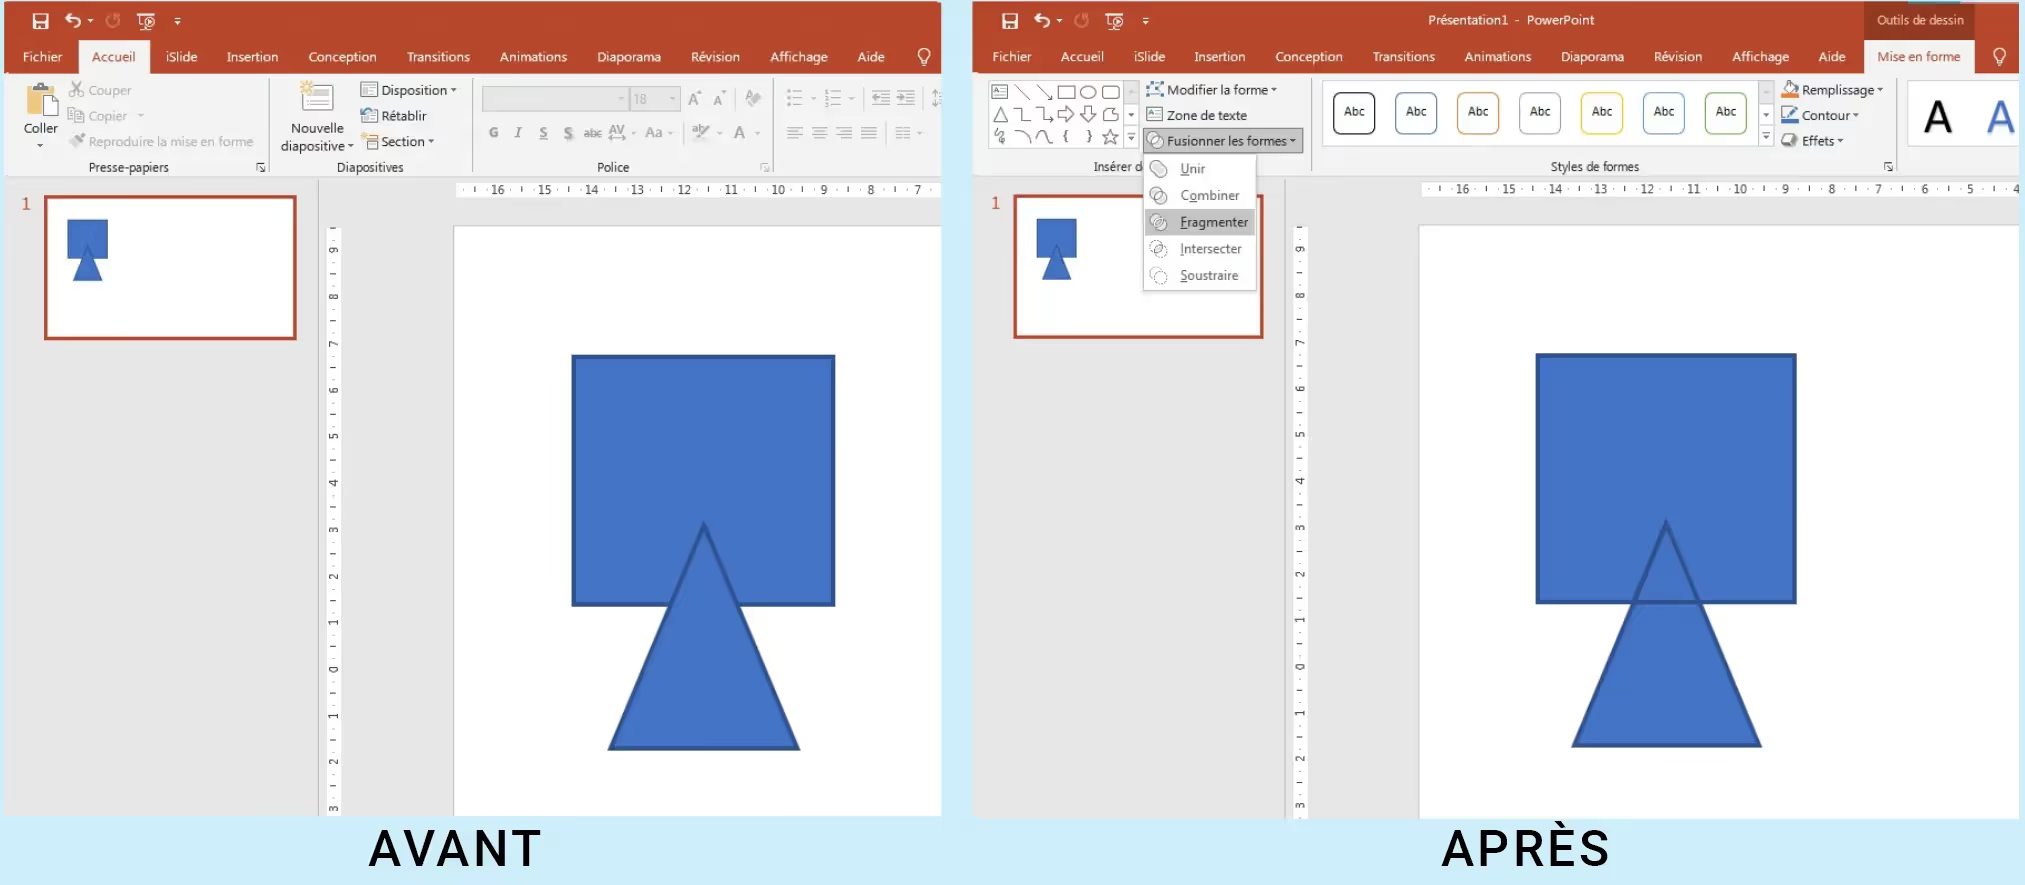
Fragment
Used to create new shapes from the area where the shapes overlap.
Starting from two different or identical shapes, start by superimposing one on top of the other. Select your two shapes, then go to the “Formatting” category, and in the “Merge Shapes” function select the “Fragment” option.
Note: The result maintains the formatting of the first selected shape.
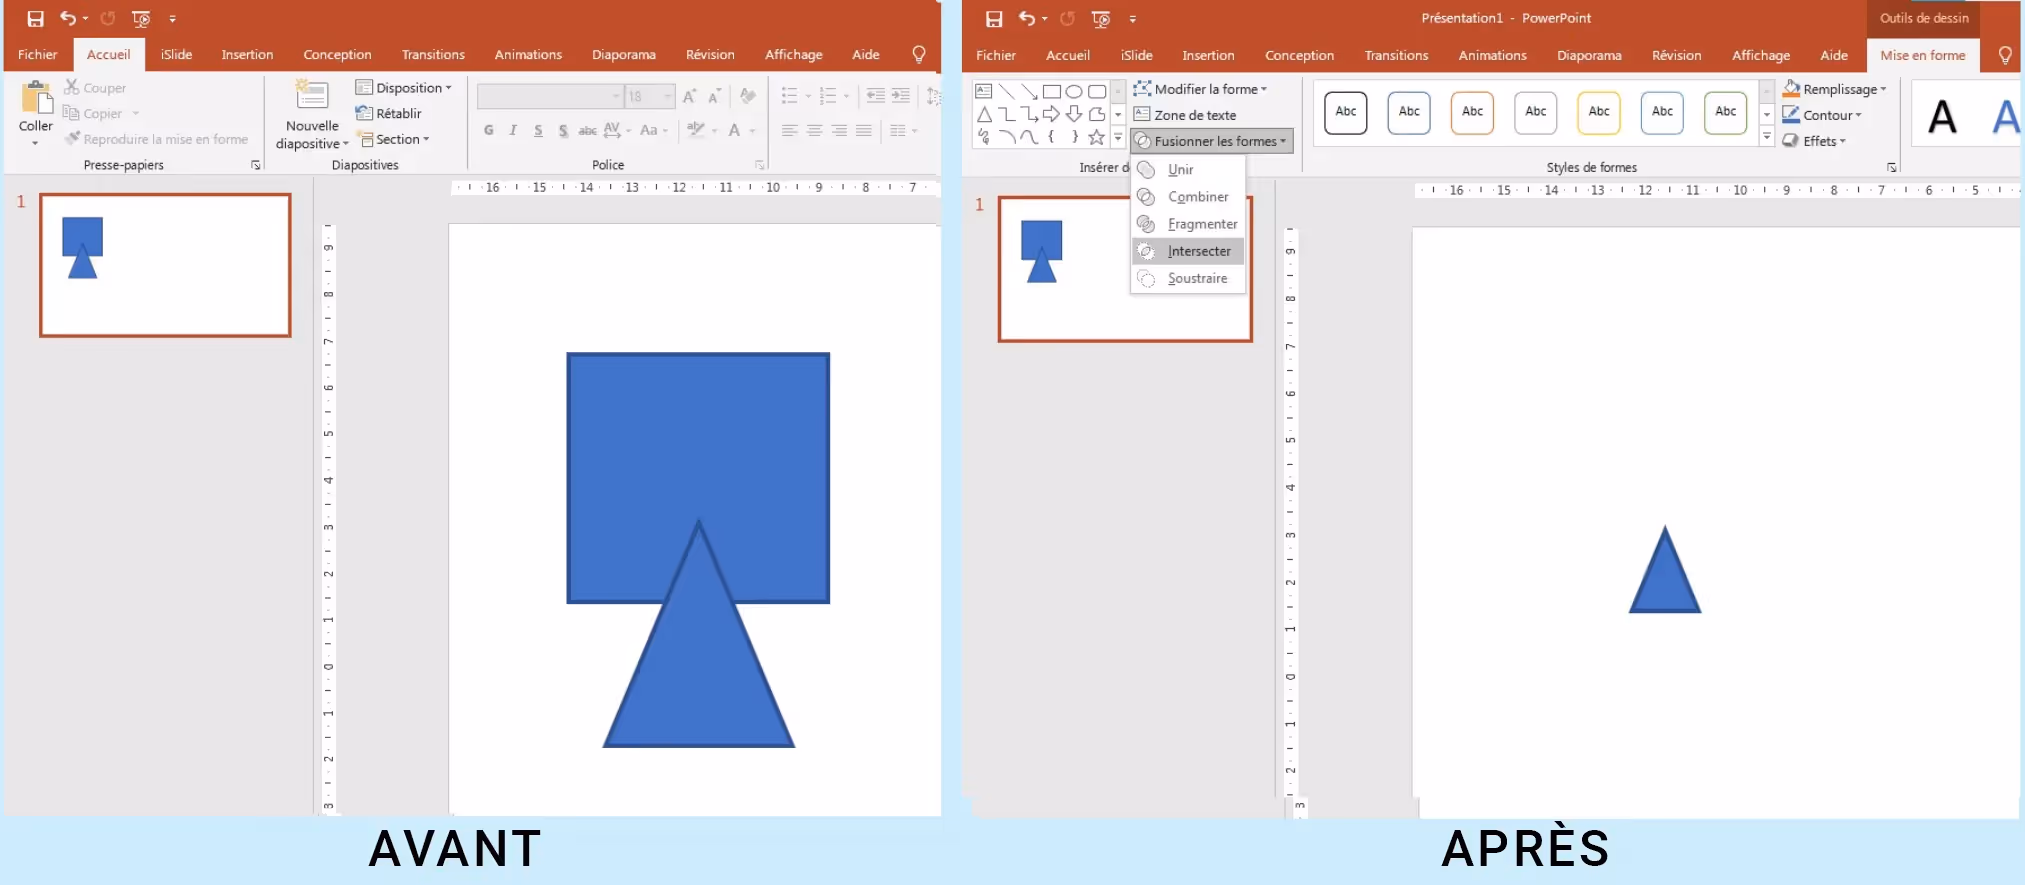
Intersect
Used to create new shapes from the area where the shapes overlap and removes areas that do not overlap.
Starting from two different or identical shapes, start by superimposing one on top of the other. Select your two shapes, then go to the “Formatting” category, and in the “Merge Shapes” function select the “Intersect” option.
The area where the two shapes overlay is now a new shape and the rest has been removed.
Note: The result maintains the formatting of the first selected shape.
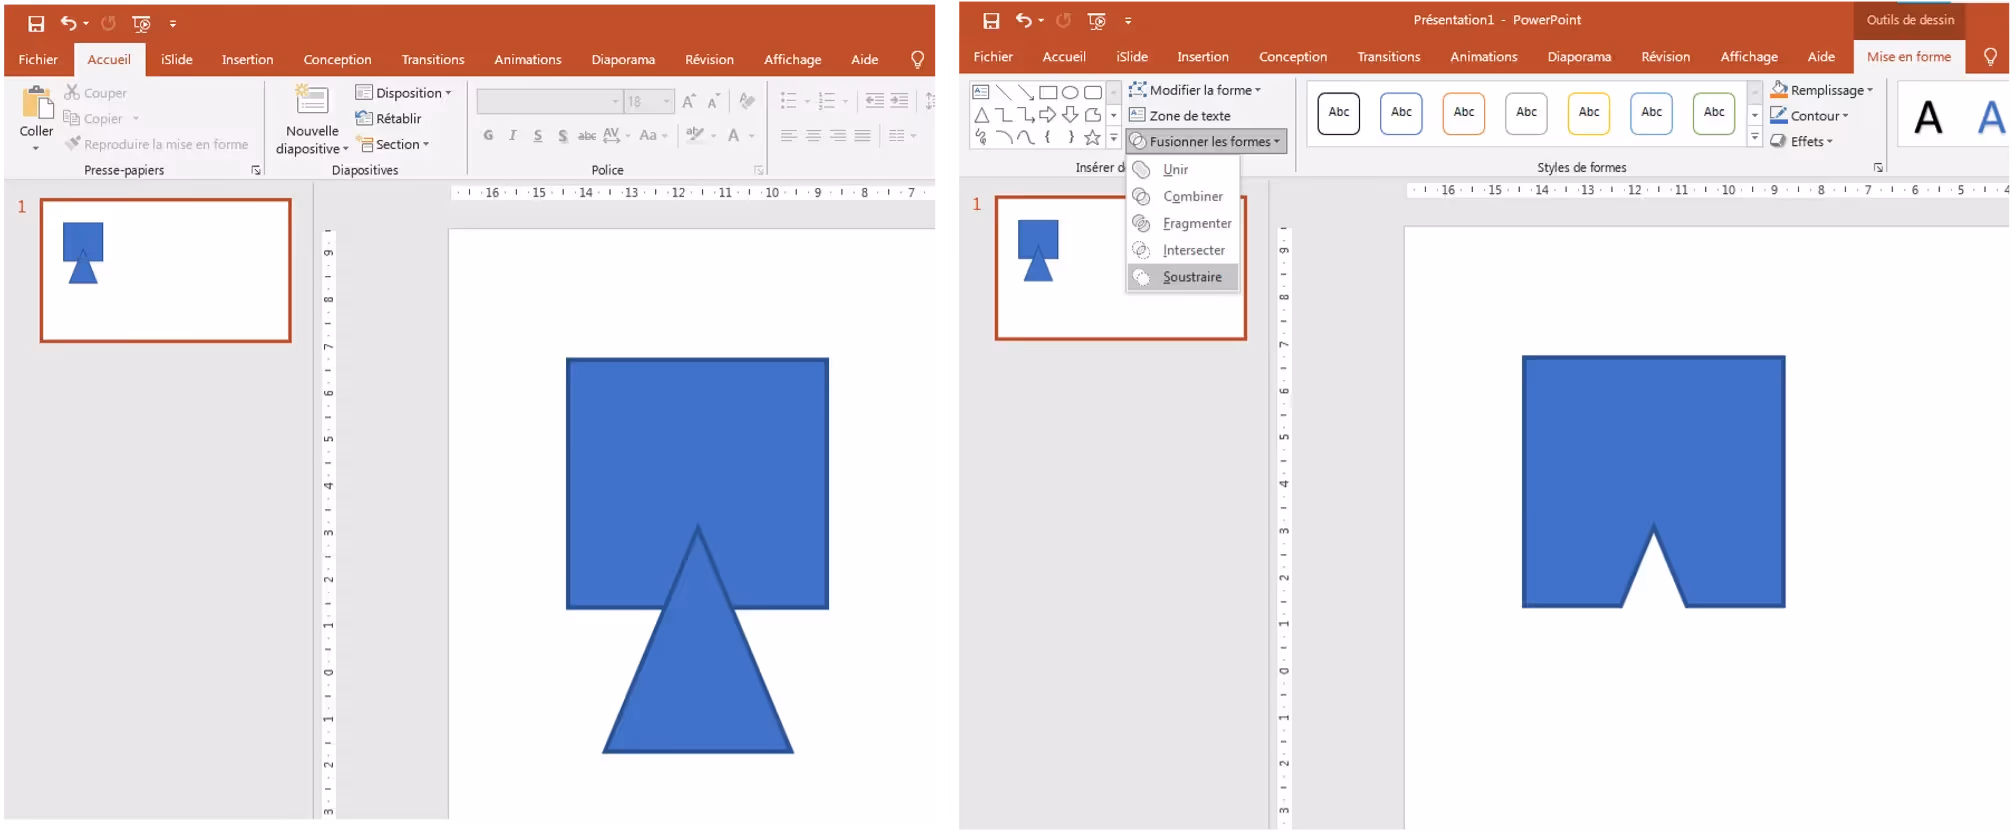
Subtract
Used to subtract the areas of overlap from your first selected shape and the second shape.
Starting from two different or identical shapes, start by superimposing one on top of the other. Select your two shapes, then go to the “Formatting” category, and in the “Merge Shapes” function select the “Subtract” option.
The overlay area of your first selected shape and the second shape has been removed.
Note: The result maintains the formatting of the first selected shape.
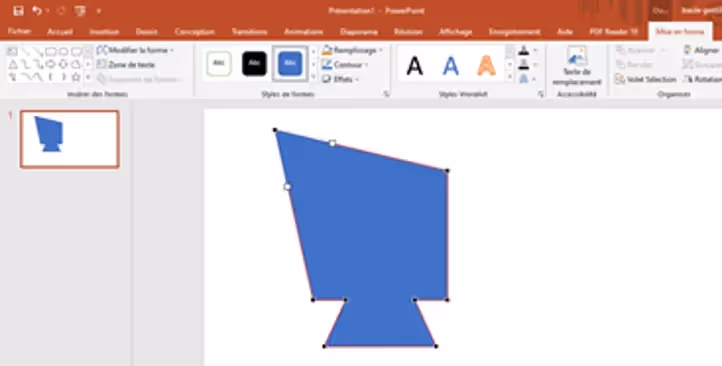
3. Edit the lines of a shape on Powerpoint
Since a shape is composed of points, you can make them move individually to allow you to obtain the shape you want either by applying slight modifications or by completely transforming it. To perform this operation, go again to the “Formatting” tab, this time, select the “modify shape” tool and then “modify the points”.
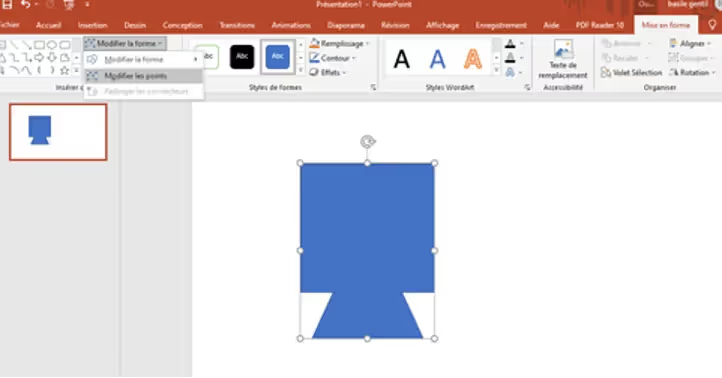
You will be able to move the points one by one to get your shape. You can then add filling effects as you wish.
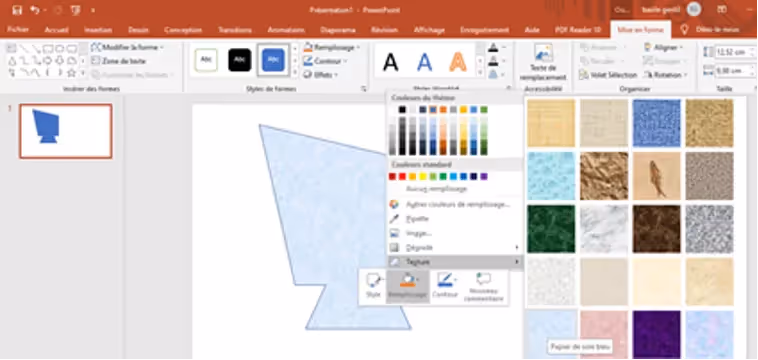
To fill the shape, once it is finished, a right click followed by “fill” will allow you to define the texture, color or pattern that you want to add to the shape for an impeccable final result. Powerpoint will thus allow you to create all the personalized shapes you want, according to the graphic charter of your company!
Our articles in the same theme:
Presentation design consultant who transforms complex ideas into clear and compelling slideshows. Expert in PowerPoint (templates, advanced animations, infographics) with a strong eye for visual storytelling and brand consistency. Experienced working under tight deadlines, supporting executives and sales teams to create presentations that engage, persuade, and leave a lasting impression.