.svg)


Many of our customers ask us:” Hi Pokeslide, How do I integrate my Excel files into my PowerPoint presentation? ”,” How do I change the data in my table from Powerpoint ? or “When I send my presentation to a collaborator, he cannot change the data in the diagrams, what should I do?” If you recognize yourself after reading these few lines, you are in the right place!
In this article, we will explore the meanderings of functions that allowuse your Excel files in Powerpoint. Of course, you can also stop reading this post here and entrust us with your slides 😉
1. Insert an Excel spreadsheet and link it to your presentation
This method allows you to insert an Excel spreadsheet into your presentation and link it. That is to say, when you make a change to this Excel file, this change will be reflected in your presentation.
1. In your Powerpoint presentation, go to the slide where you want to integrate the spreadsheet.
2. Go to the tab Inserting and click on Purpose

3. A new dialog box” Insert object ” opens, then click on” From a file ”
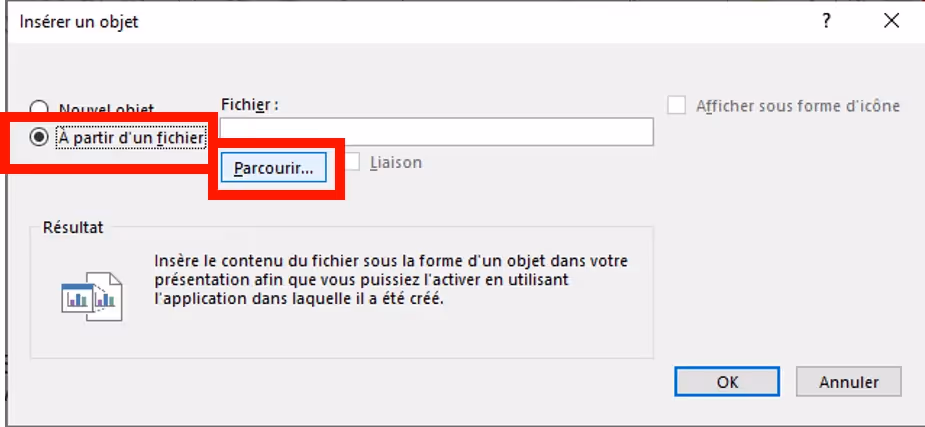
4. Select” Browse ” to find the Excel file to integrate into your presentation and click “Ok”
5. After making your choice, simply check the “Link” option and do” Ok ”
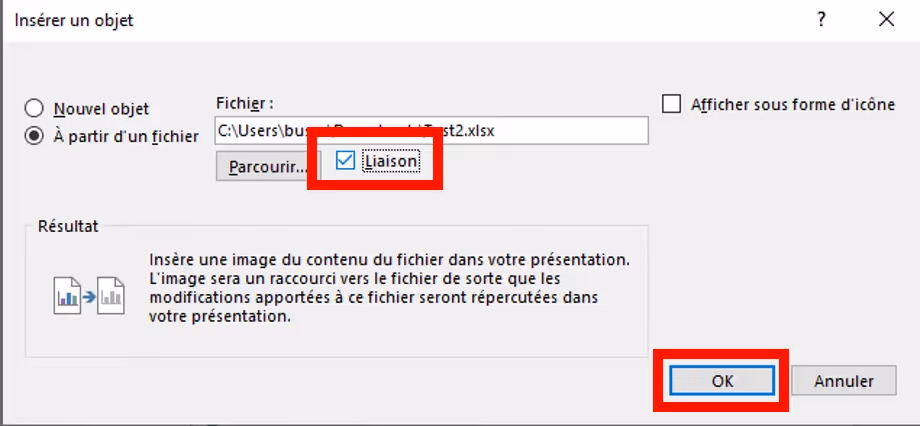
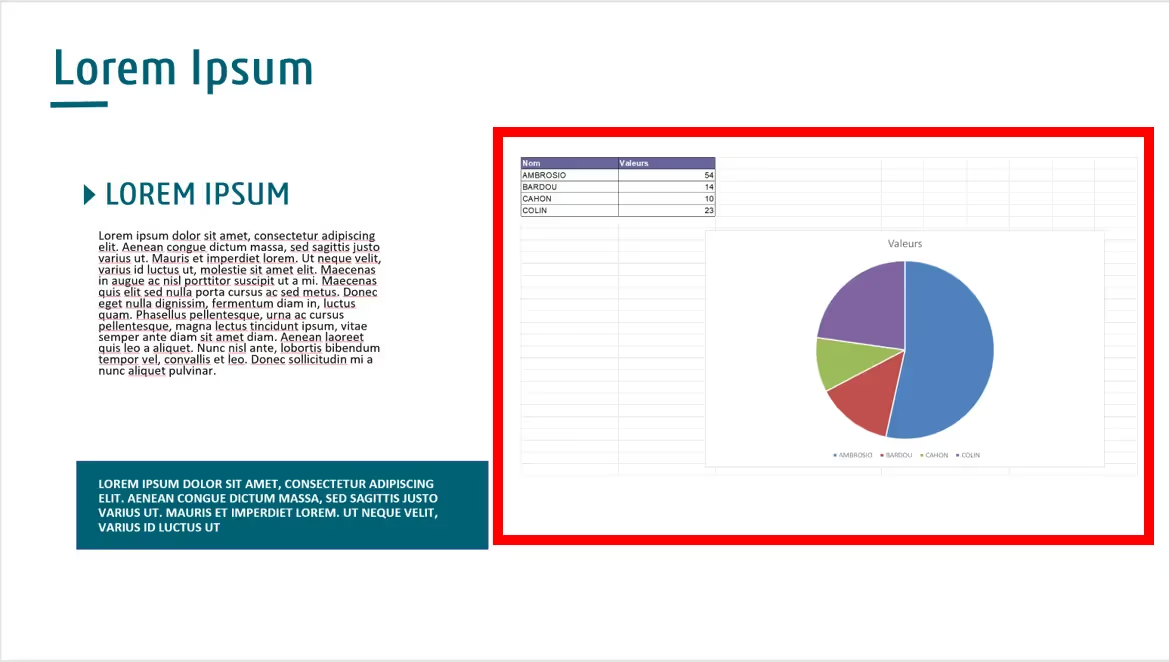
6. Your Excel spreadsheet is then displayed on your slide.
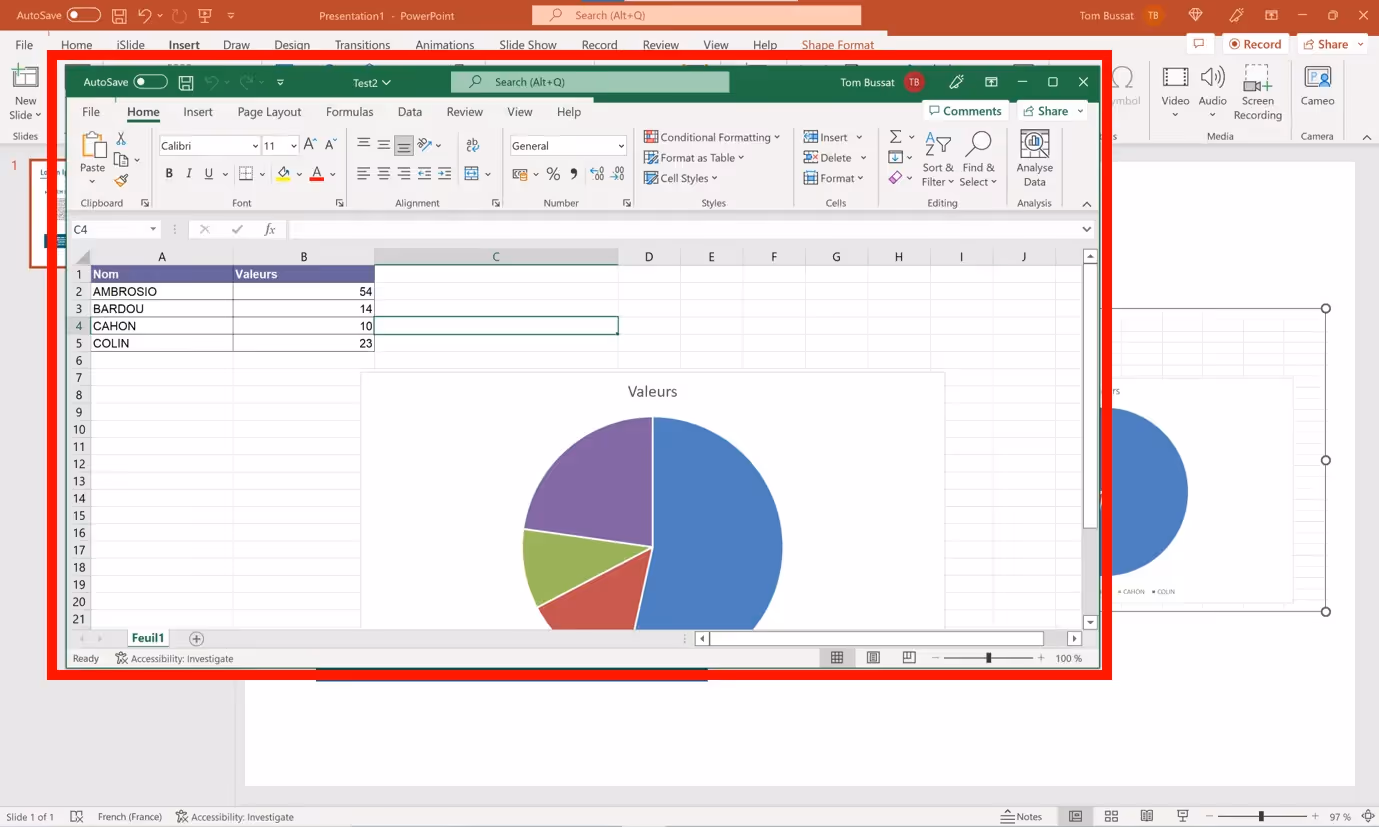
7. To change the data in the form, double-click on the object and the Excel document opens.
8. Once the data has been modified, the update is automatically done on your slide.
Attention:
When you link the object to your presentation, you no longer need to move to another folder on your computer or delete the Excel file to avoid breaking the link between the file and your presentation. Also, if you want to send the presentation to a collaborator, they won't be able to edit the file because the link will no longer be active.
2. Insert an unlinked Excel spreadsheet into your presentation
This method allows you to insert an Excel spreadsheet into your presentation without linking it. The spreadsheet will not be updated in the presentation if you make changes.
1. In Excel, open the saved workbook that contains the data you want to copy.
2. Select the data area to be copied and done Copy
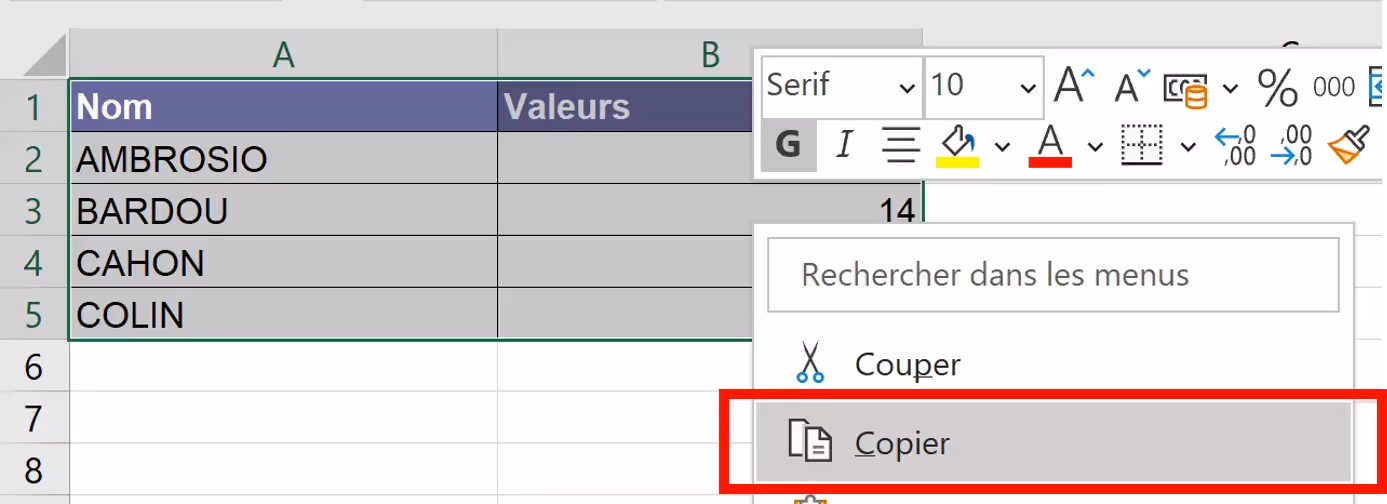
3. Back on your PowerPoint presentation, go to the destination slide and do Coller.
4. There are then several Paste Options visible when you click on the button/icon below:

Here are the existing paste options:

Use destination styles: Allows you to copy the values and transform them into a table using the graphic style specific to your presentation, defined in your mask.


Keep source formatting: Allows you to copy values and turn them into a table using the graphical style of the table in the Excel spreadsheet.


Incorporate: Display an image from your Excel sheet. This image is dynamic: if you change the data in the Excel file, the image in the PowerPoint is updated.


Picture:Allows values to be copied in still image format and cannot be modified.

Keep text only: Allows values to be copied in text box format without any graphic styling/formatting

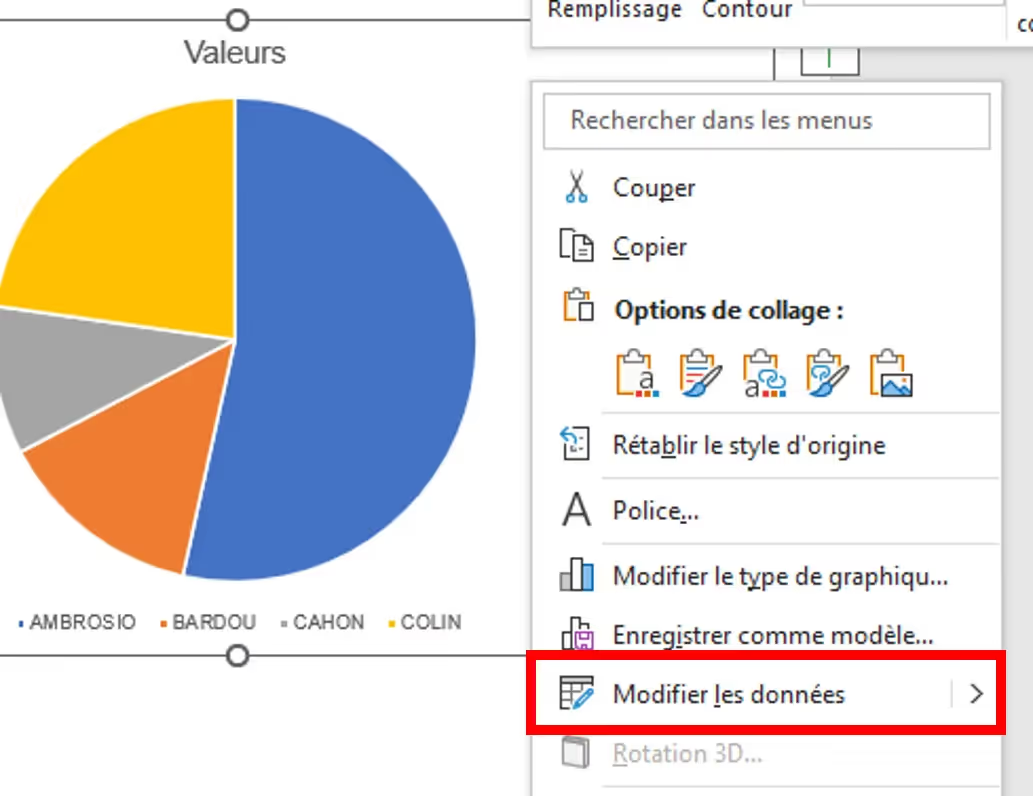
3. Edit a chart, or Excel chart from your presentation
If you want to change the values in your table, chart, or chart from PowerPoint, simply follow these steps:
1. In Powerpoint, go to the slide with the object you want to modify
2. Right click on the object then select” Edit data ”
3. The spreadsheet linked to the object will then open with the indicative” Linked data ”.
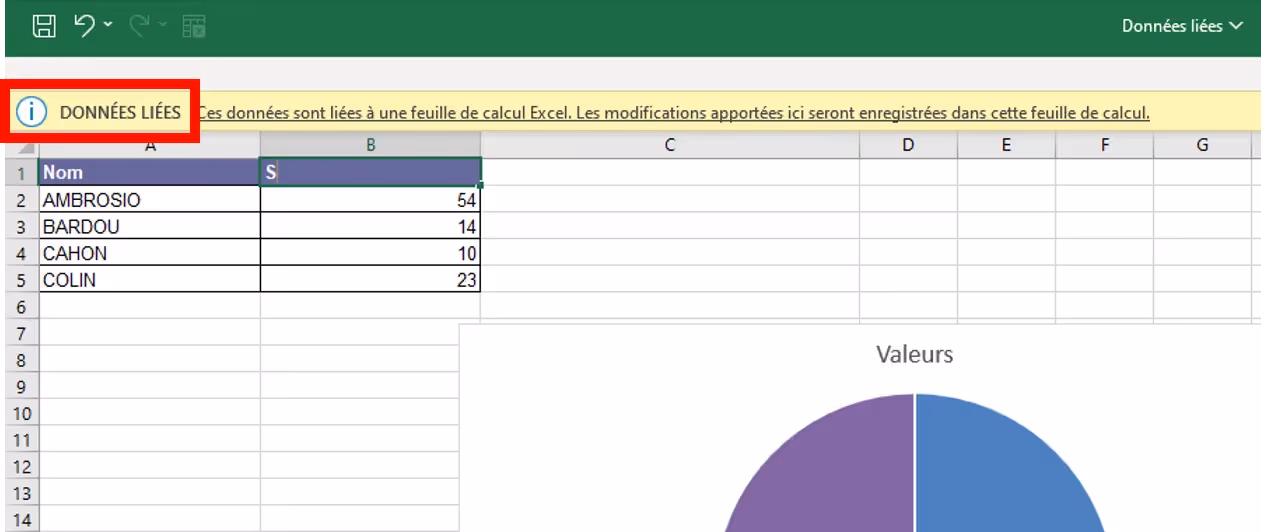
4. Make your changes, save, and close the Excel file.
5. Once you get back to your slide, the update will be done automatically.
6. To change the chart type, right click and select” Change chart type ”
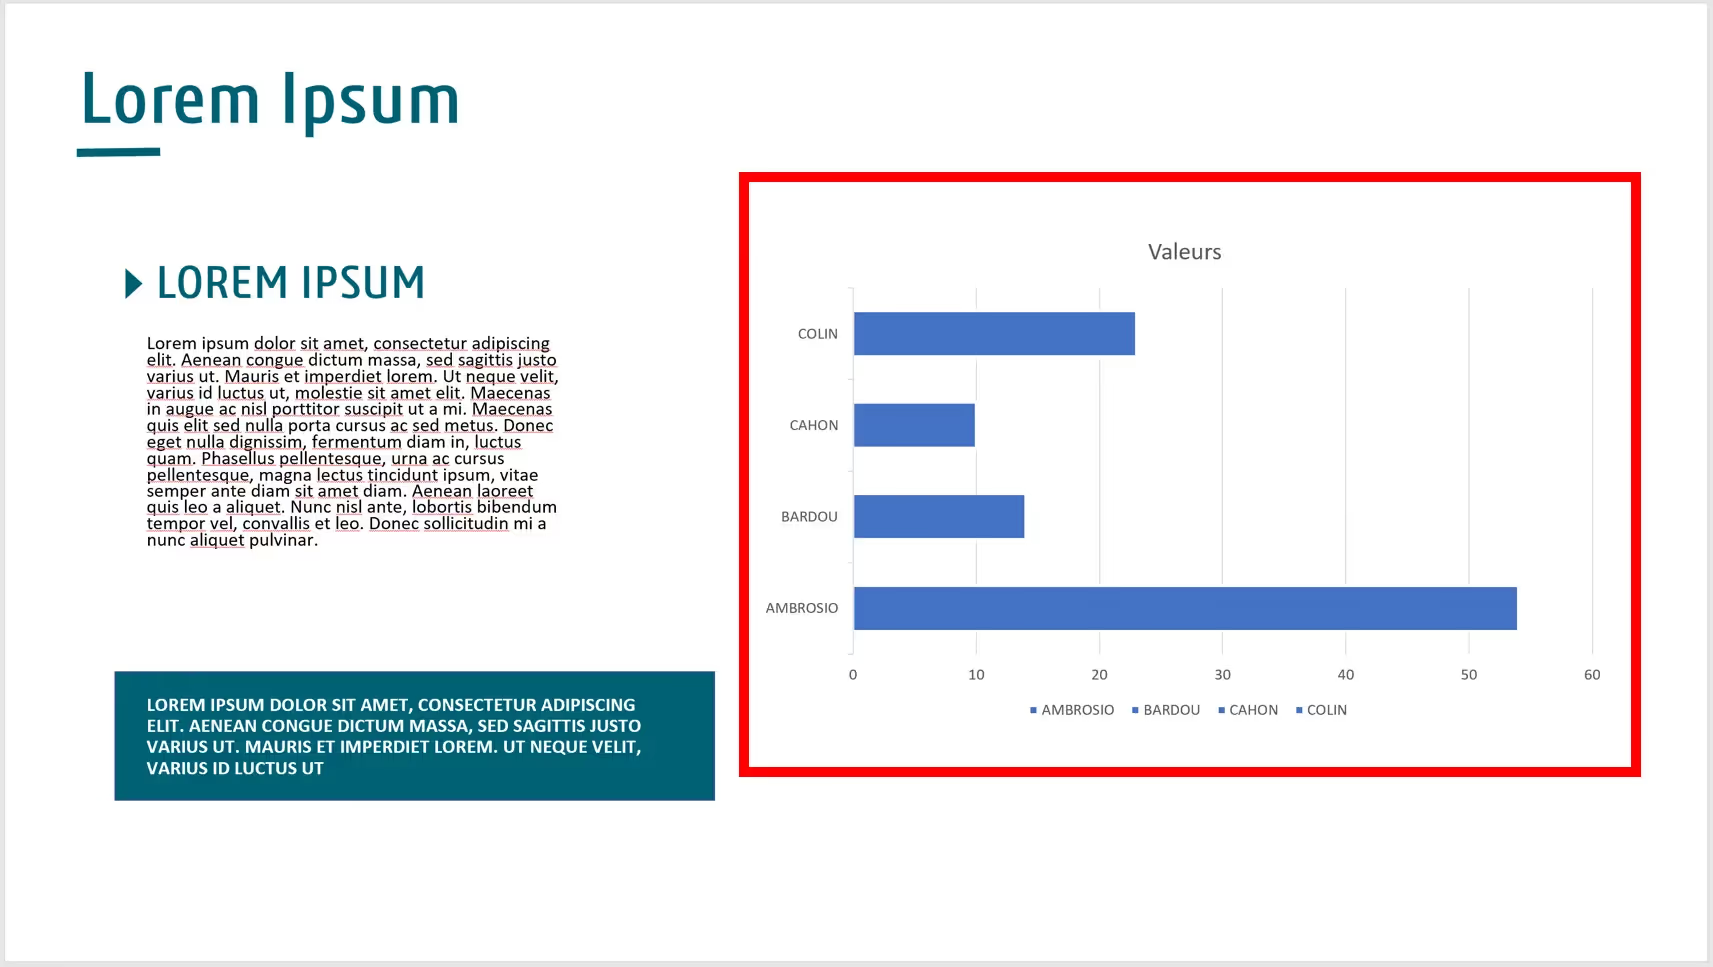
7. In this new window, select the type of chart you want and make OK.
8. The chart style applies to your slide.
If you have made it this far, congratulations to you, you deserve a second dessert at the cafeteria! We are aware that all these manipulations are complicated and difficult to handle. If you need a hand feel free to go through our Pokeslide PowerPoint expert teams.
Our articles in the same theme:
Presentation design consultant who transforms complex ideas into clear and compelling slideshows. Expert in PowerPoint (templates, advanced animations, infographics) with a strong eye for visual storytelling and brand consistency. Experienced working under tight deadlines, supporting executives and sales teams to create presentations that engage, persuade, and leave a lasting impression.