.svg)
21 March, 2025
How do I loop through a PowerPoint slideshow?


Do you want to loop your slideshow without having to touch your mouse? Good news: it's possible! To do this, simply go and take a look at the slideshow settings. We will therefore show you the different steps to follow to set up either a specific slide or the entire PowerPoint slideshow in a loop. A simple configuration that will give the most beautiful effect to your PowerPoint presentation.
1. Scroll through a PowerPoint presentation in a loop
To make sure your PowerPoint slideshow loops and starts automatically, you won't have to run into too many obstacles. This feature is also very interesting for corporate presentations or for a background video in a theater, cinema or agency. Thus, the presence of a presenter who presents each slide manually is no longer required! Everything is done automatically and easily.
Why choose to automatically start your Powerpoint presentation?
Choosing to loop a Powerpoint slideshow is to ensure that the audience can have enough time to view each slide. Sometimes, through anxiety or by accident, the presenter quickly skips the slide. This system makes it possible to avoid any problem of this type. Everything is set up in such a way that visualization and understanding take place correctly.
Set the 10-second timer between slides
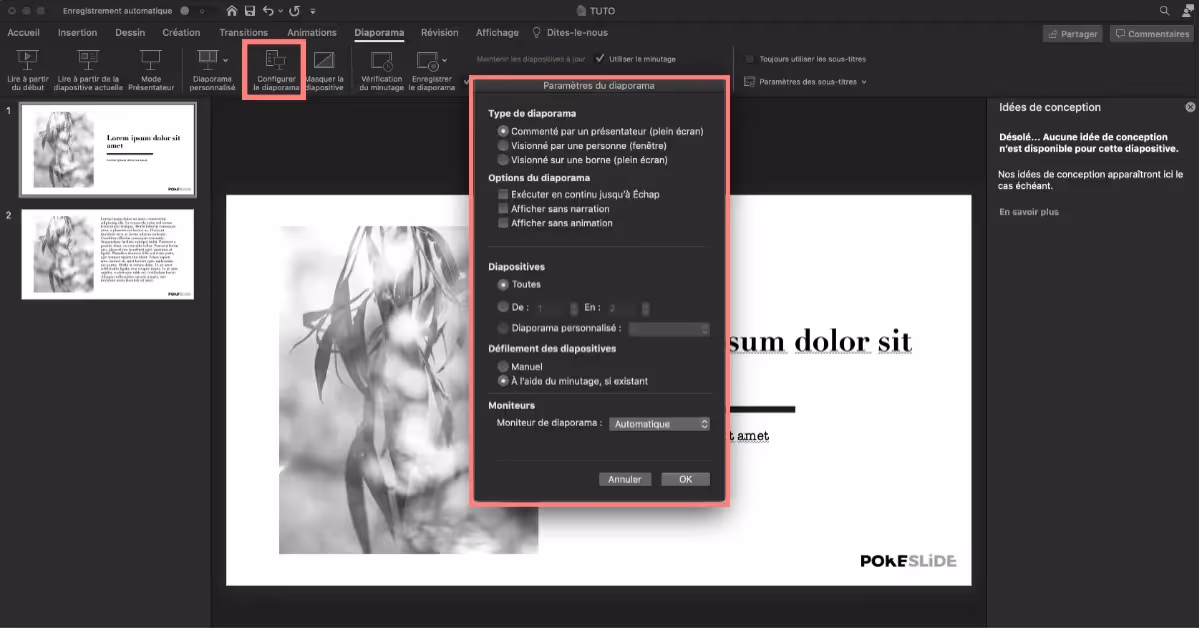
To perform this operation, you will need:
- Click on the “Slideshow” button in the Powerpoint toolbar;
- Select the “Set up slideshow” button;
- Set the synchronization of all the slides to a 10-second timer between each slide;
- Click “OK” to save the settings.
Afterwards, all you have to do is check that the new configuration works!
As you can see, Powerpoint offers multiple functionalities that allow you to adapt your presentation according to your needs. All you have to do here is to be meticulous in the settings, to carefully record the settings and to check that the entire presentation is activated correctly.
Want to know more about creating a looped slideshow? The Pokeslide agency teams are specialists in creating Powerpoint presentations. We are happy to help you create the presentation that's right for you!
2. Set the timing of a slide on PowerPoint
Setting up a PowerPoint in a loop is great, however, if you want to set a specific timing on a single slide (particularly loaded with content and requiring more time for example), this is possible very simply.
1. Choose the slide
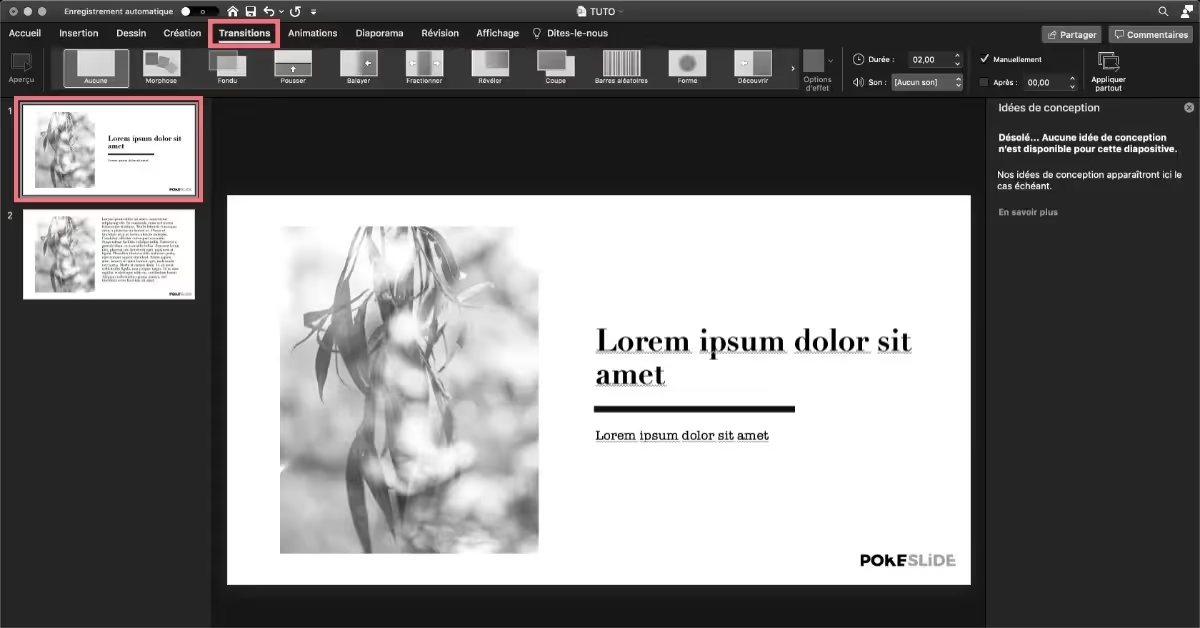
The first thing you need to do is select the slideshow slide you want to loop. Then click on the “Transitions” tab accessible from the toolbar and select the slide to loop.
2. Set the timer for the PowerPoint slide to be looped
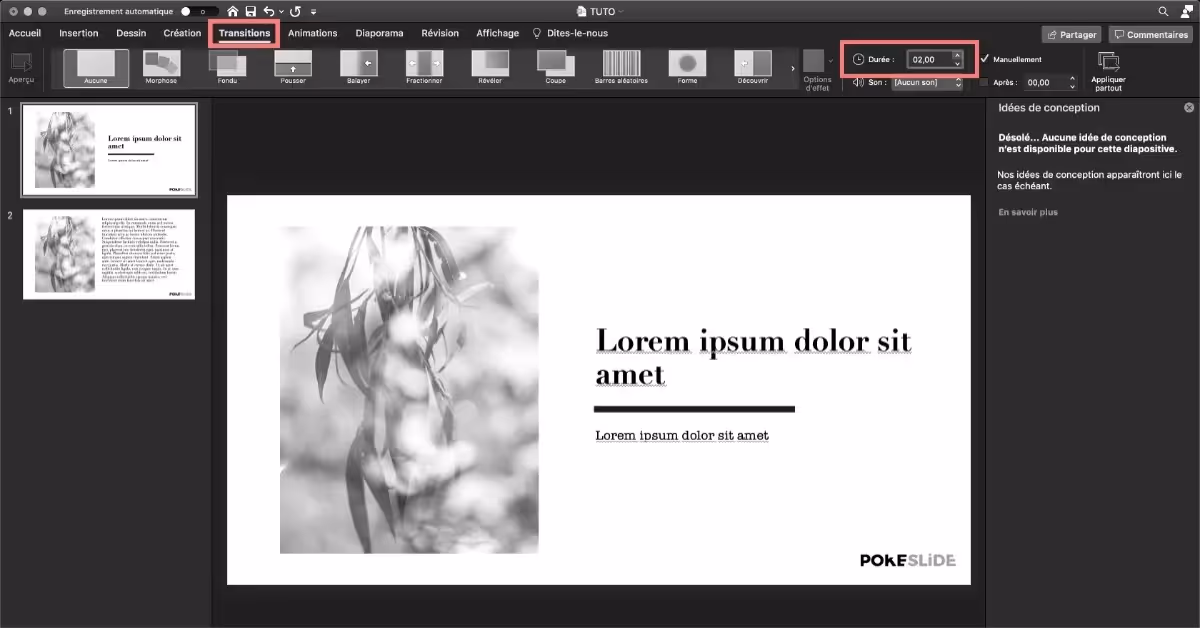
Once you have made this selection, it is now time to insert the slide timing. It's up to you to choose the time you want to insert: 2 seconds, 4 seconds, 10 seconds... It all depends on the content on the slide. If there is a lot of information to read and understand, it is best to give your audience time to fully understand it.
3. Test the slide in question
It's then up to you to save the new settings and check that everything works perfectly! In particular, you can launch the entire presentation to ensure that the slide fits perfectly with the entire PowerPoint.
Our articles in the same theme:
Presentation design consultant who transforms complex ideas into clear and compelling slideshows. Expert in PowerPoint (templates, advanced animations, infographics) with a strong eye for visual storytelling and brand consistency. Experienced working under tight deadlines, supporting executives and sales teams to create presentations that engage, persuade, and leave a lasting impression.